Sunday, March 29, 2015

Thinking of Spring!
 
Glitter Accents
Spring has arrived and I am ready for warmer days and flowers in every color of the rainbow.  But the temperatures dropped into the 30's, the weathermen mentioned the possibility of snow flurries, and all we have peeking out of the ground is a hint of crocuses and the stems of daffodils. 

Time to dig into my floral stamps and create my own flower garden.

When I think brightly colored backgrounds, I immediately turn to my dylusions' spray inks in Funky Fuchsia and London Blue.  I used a water mister and a circle stencil to create the faded circle background.  Even though I combined different types and brands of floral rubber stamps, they worked well together.  Then I grabbed my bright Marvy markers and created my flower garden using all the colors in the rainbow.  Sunshine was added with glitter, of course.

Welcome Spring!

Friday, March 27, 2015


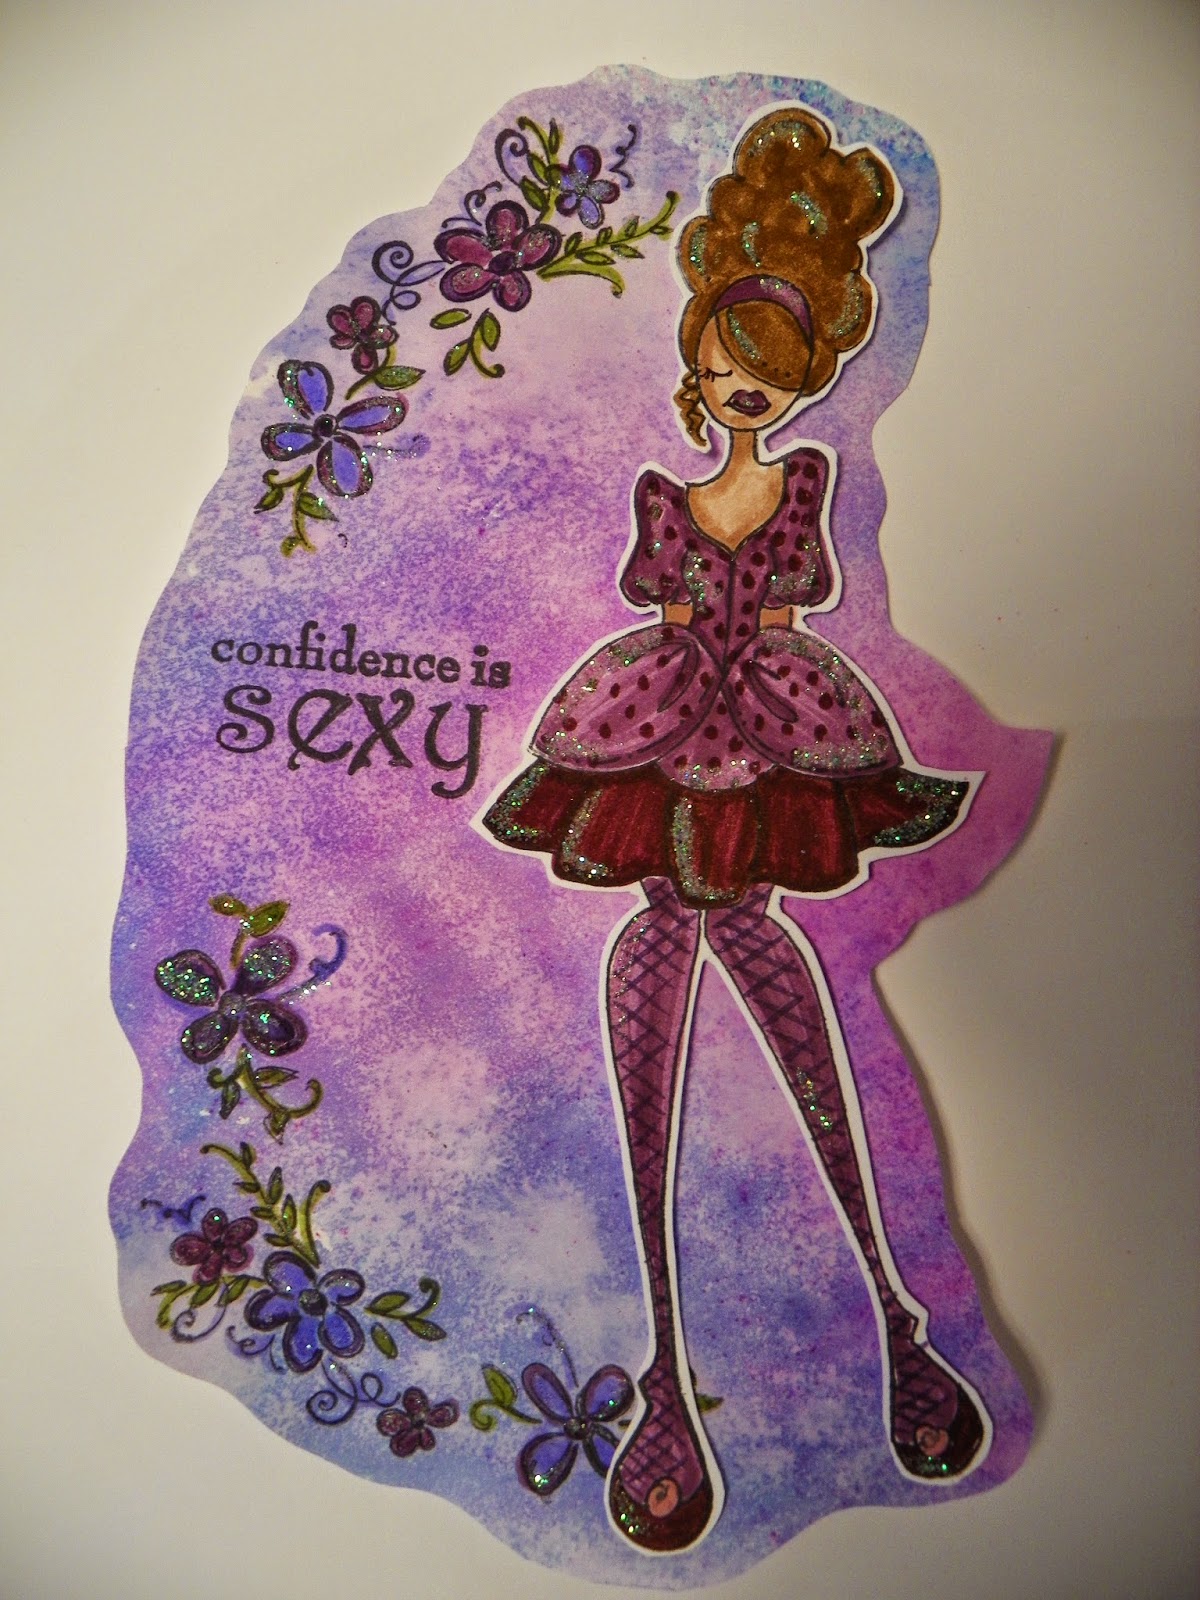
I have a lot of fun rubber stamping with one of my favorite Julie Nutting doll stamps.  This one is called "Mindy."  I like to stamp her a couple of times on white and/or beige card stock and then use my markers to color her in with different color combinations.  As always, I "toss in a little glitter" to accent her image.  I like to use white craft glue and a very fine paint brush to add touches of glue and then sprinkle with very fine glitter.  I also like to fussy cut around the doll stamp leaving a thin border.  This makes it easy to add her to greeting cards, gift tags, collages or just about anything you can think of.


Sunday, March 22, 2015

Next weekend is the annual rubber stamp expo in our area and I am super excited.  I am looking forward to seeing what is new in the world of paper crafts.  I love to watch the demonstrations, try some of the make-n-takes and learn new tips.  

This year I decided to enter the artist trading card contest to win "rubber bucks".  The theme of this year's expo is "Kings and Queens."  So my version of  Kings and Queens is none other than the King himself, Elvis and the Queen of Soul, Aretha Franklin.

Kings and Queens, Artist Trading Card


I cut a manilla tag to 2 1/2 x 3 1/2 and created the background with ink sprays and stencils and then used a different stencil and marker to add the dots and swirls.  I printed my images and cut them down and attached them to the card.  The crowns were rubber stamps that I stamped on separate paper, cut out and attached to the heads.  I then added the music theme stickers and finished off the card with Stickles glitter.

Wish me luck!  I'll let you know how I did and what caught my eye at the expo.

UPDATE on my artist trading card experience...Silly me.  Since this was my first experience with ATCs, I totally misunderstood the purpose at the expo.  I thought you handed in your ATC and the vendors voted on a winner.  I didn't know that you made a bunch and traded them with other artists, crafters, etc.  So, silly me, after looking at all the creative and beautifully done ATCs, I stuck my ONLY ATC in my pocket and walked into the expo to shop, shop, shop!


Tuesday, March 17, 2015


Hello!  I was "getting my craft on" and thought of a few tips that might help you when you are crafting.
  •  It is easy to add small glitter accents by using a very fine cheap paint brush to add craft glue and then sprinkle with very fine glitter.
  •  Tired of coloring rubber stamp images, you can change it up by stamping the image on several pieces of printed card stock and then cutting the individual pieces out.
I hope these tips help and if you ever have any questions about something you see on my blog, I would be happy to answer them.

Monday, March 16, 2015

I finally purchased dylusions ink sprays in Cherry Pie and Funky Fuchsia.  I couldn't wait to try them out.  Let me just say, I love, love, love the colors.  I especially love the combination when using them with London Blue.  I played around a little bit with the ink sprays and stencils, added some flower stamps and my "go-to" girl stamp, colored everything with Marvy bright markers and this is the design I came up with.


Here is a close-up so you can see how I like to fussy-cut around my designs. I can then take this design and glue it on a blank greeting card.  I would also add colored gems to the center of some flowers for a fun look, add pop dots under the girl for a 3D effect, and maybe a little more glitter!


Hope you like this fun idea!

Sunday, March 15, 2015

Spring is just around the corner, but I came across some cute winter stickers in my stash that I just had to use.  I also had a blank picture frame sitting on my craft table that needed some pizzazz.  I found a sheet of scrapbook paper that would set off the stickers and then I was ready to craft.  Since the stickers were already glittered this was a quick and easy craft.


The bare wood frame was primed and left to dry.  Mod Podge was applied to the dry frame, scrapbook paper was attached and layered with more Mod Podge.  When the frame was dry, the excess paper was removed and the stickers were added.


Even though the snow on the ground is getting sparse and dirty and I know Spring is just around the corner, this is so much better to look at and it brightens my craft table!